How to Set Up the NVIDIA Jetson Orin Nano Super Completely Headless
No Monitor, No Keyboard, No Problem
By Ammar
A complete guide to going from a brand new Jetson Orin Nano Super Developer Kit to a fully SSH-accessible Linux system using nothing but a Mac, a USB-C cable, and an SD card.
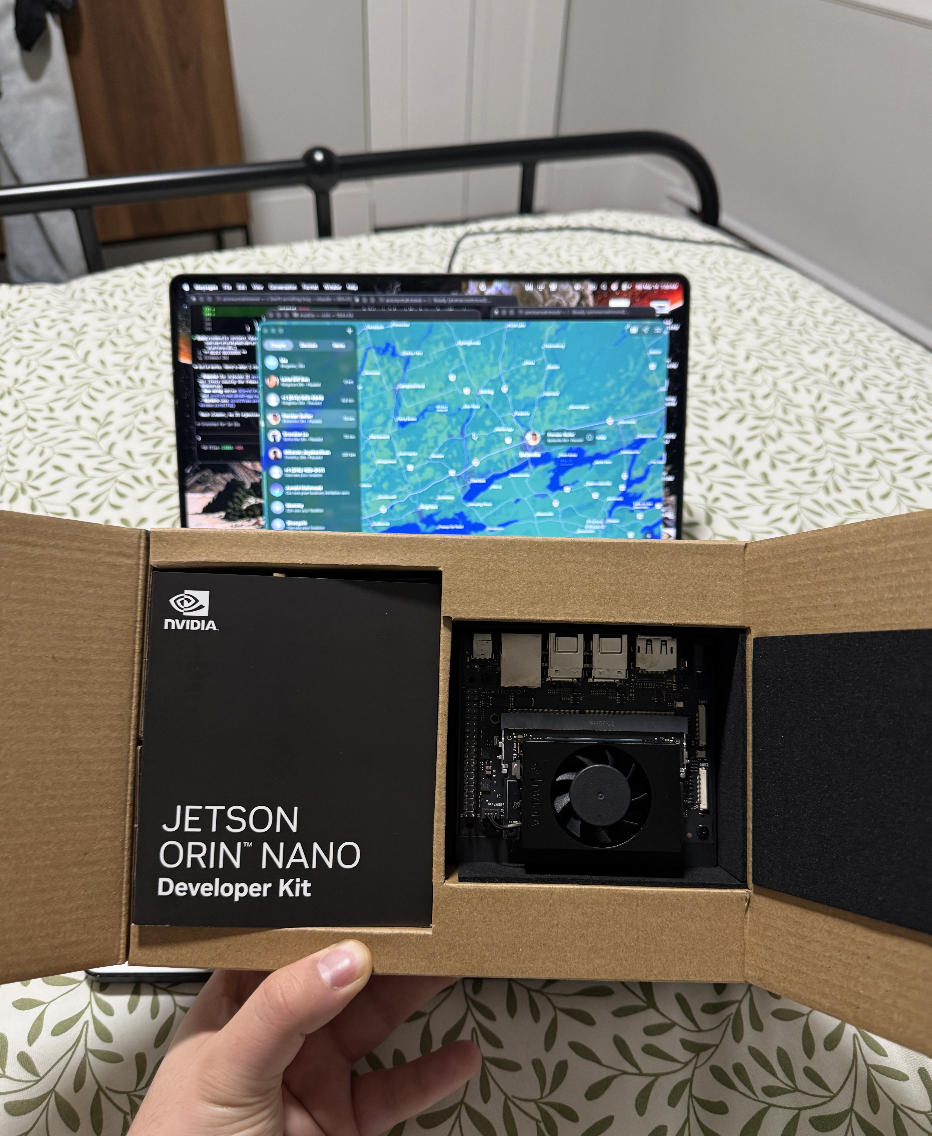
The Jetson Orin Nano Super Developer Kit fresh out of the box
What You Need
- •NVIDIA Jetson Orin Nano Super Developer Kit
- •MacBook (any model with a USB-C port)
- •microSD card (64GB or larger, Class 10 UHS-1 V30 or better)
- •USB-C to USB-C cable (data capable, not charge-only)
- •Barrel jack power supply (comes in the box)
- •Internet connection on your Mac
The Big Picture
Before you start, here is what is actually happening and why the process has multiple steps.
The Jetson Orin Nano Super ships from the factory with old QSPI firmware that cannot boot JetPack 6.x. You must first boot JetPack 5.1.3 to update the firmware, then swap to JetPack 6.2. On top of that, the first boot normally requires a GUI setup wizard called oem-config which needs a keyboard and monitor. This guide bypasses all of that entirely.
The secret weapon: USB serial console. Most headless guides focus entirely on SSH and USB ethernet. What they miss is that the Jetson exposes three separate interfaces over the USB-C cable simultaneously as soon as it boots:
- •A virtual ethernet interface at 192.168.55.1 (for SSH and file transfer)
- •A USB mass storage device called L4T-README containing setup documentation
- •A USB serial terminal at /dev/tty.usbmodem* that gives you a direct shell
The serial terminal is the most important one because it works regardless of whether SSH is configured, and regardless of whether oem-config ran successfully. It is your unconditional escape hatch into any running Jetson. We use it as the primary method in this guide rather than a backup, because it is simply more reliable.
Download Both SD Card Images
You need two images. Download both before starting.
JetPack 5.1.3 (for firmware update):
https://developer.nvidia.com/downloads/embedded/l4t/r35_Release_v5.0/jp513-orin-nano-sd-card-image.zipJetPack 6.2 (the actual OS you want):
https://developer.nvidia.com/downloads/embedded/l4t/r36_release_v4.3/jp62-orin-nano-sd-card-image.zipBoth are .zip files around 7GB each. Do not unzip them. Download Balena Etcher if you don't have it already.
Flash and Boot JetPack 5.1.3 to Update Firmware
This step updates the factory firmware so JetPack 6.x can boot. You do not need to complete the setup wizard. The firmware updater runs silently in the background.
- Open Balena Etcher
- Select the
jp513-orin-nano-sd-card-image.zipfile - Select your microSD card as the target
- Click Flash and wait for it to complete
- Insert the microSD card into the slot on the underside of the Jetson module (not the carrier board — look underneath the compute module itself)
- Plug in the barrel jack power supply. The Jetson will power on automatically with a green LED
- Wait exactly 5 minutes. Do not touch anything. The firmware updater is scheduling itself silently in the background
- Unplug the barrel jack power supply
- Wait 10 seconds, then plug it back in
- The Jetson will now perform the actual firmware update during this boot. The fan may speed up and slow down. After a few minutes it will get stuck and stop doing anything. This is normal and expected
- Unplug the barrel jack power supply again. The firmware is now updated
Prepare the JetPack 6.2 SD Card
Now flash the real OS image.
- Take the microSD card out and put it back in your Mac
- Open Balena Etcher
- Select the
jp62-orin-nano-sd-card-image.zipfile - Select your microSD card as the target
- Click Flash and wait for it to complete
Do not put the SD card back in the Jetson yet. You need to modify it first.
Install Required Tools on Your Mac
You need e2fsprogs to write files to the Linux ext4 partition on the SD card.
brew install e2fsprogsModify the SD Card to Enable SSH on First Boot
With the freshly flashed SD card still in your Mac, run the following commands in order.
Find your SD card:
diskutil listLook for a disk with multiple Linux Filesystem partitions. The large 22GB partition called disk6s1 is the root filesystem. It is almost always disk6 but confirm by looking at the sizes.
Unmount the SD card:
sudo diskutil unmountDisk /dev/disk6Create the SSH host key generation script:
cat > ~/firstboot.sh << 'EOF'
#!/bin/bash
useradd -m -s /bin/bash jetson
echo "jetson:jetson123" | chpasswd
usermod -aG sudo jetson
ssh-keygen -A
systemctl enable ssh
systemctl start ssh
EOF
Write it to the SD card (replace YOUR_USERNAME with your Mac username):
sudo /opt/homebrew/opt/e2fsprogs/sbin/debugfs -w /dev/disk6s1 -f - << 'EOF'
write /Users/YOUR_USERNAME/firstboot.sh /etc/rc.local
set_inode_field /etc/rc.local mode 0100755
EOF
Create a systemd service to run the script on boot:
cat > ~/ssh-firstboot.service << 'EOF'
[Unit]
Description=First boot SSH setup
After=network.target

[Service]
Type=oneshot
ExecStart=/bin/bash /etc/rc.local
RemainAfterExit=yes

[Install]
WantedBy=multi-user.target
EOF
Write the service to the SD card:
sudo /opt/homebrew/opt/e2fsprogs/sbin/debugfs -w /dev/disk6s1 -f - << 'EOF'
write /Users/YOUR_USERNAME/ssh-firstboot.service /etc/systemd/system/ssh-firstboot.service
symlink /etc/systemd/system/ssh-firstboot.service /etc/systemd/system/multi-user.target.wants/ssh-firstboot.service
EOF
Eject the SD card:
diskutil eject /dev/disk6Boot the Jetson
- Insert the microSD card into the Jetson module slot
- Plug the USB-C cable from the Jetson's USB-C port (the one next to the 40-pin GPIO header, not the power port) into your Mac
- Click Allow when macOS asks about a new network connection
- Plug in the barrel jack power supply
- Wait about 90 seconds for the Jetson to fully boot
Test that the Jetson is online:
ping 192.168.55.1You should get replies. The Jetson hardcodes itself to 192.168.55.1 and your Mac gets 192.168.55.100 automatically over USB ethernet. If ping is not responding yet, wait another 30 seconds and try again.
Connect via Serial Console
This is the primary and most reliable way to get a shell into the Jetson. Do this before trying SSH. The serial terminal is available as soon as the Jetson boots and requires no prior configuration.
Find the serial device:
ls /dev/tty.usbmodem*You will see something like /dev/tty.usbmodem14237250998903. The exact number varies but there will only be one entry.
Connect:
screen /dev/tty.usbmodemXXXXXXXXXXXXX 115200You will either get a login prompt or a root shell directly. If oem-config failed, you will see a message like:
ERROR: The OEM installer failed. Your system may not be usable yet.
To create a user so that you can use your new system normally, type:
    adduser USERNAME

root@localhost:/#
This is actually ideal. You have a root shell with no password required.
Create your user:
adduser jetsonFollow the prompts, set a password, fill in or skip the name fields.
Give sudo access:
usermod -aG sudo jetsonGenerate SSH host keys, enable permanently, and start SSH:
ssh-keygen -A
systemctl enable ssh
systemctl start ssh
systemctl enable makes SSH start automatically on every reboot. systemctl start starts it right now. Both are required. If you only run start, SSH will stop working after the next reboot and you will have to come back to the serial console to restart it.
To exit the screen session: press Ctrl+A then K then Y.
SSH In
From a new terminal tab on your Mac, clear any old host key and connect:
ssh-keygen -R 192.168.55.1
ssh jetson@192.168.55.1
Enter the password you set during adduser. You are now fully inside the Jetson over SSH with no monitor or keyboard ever used.
Complete the System Configuration oem-config Would Have Done
Because we bypassed oem-config, the things it normally sets up — username, password, hostname, timezone, locale, and keyboard layout — were never configured through the wizard. Run all of these over your SSH session.
Set the hostname:
sudo hostnamectl set-hostname your-jetson-nameSet your timezone:
sudo timedatectl set-timezone America/TorontoFind your timezone string with: timedatectl list-timezones | grep -i your_city
Set locale:
sudo locale-gen en_US.UTF-8
sudo update-locale LANG=en_US.UTF-8 LC_ALL=en_US.UTF-8
Set keyboard layout (only matters if you ever attach a physical keyboard):
sudo dpkg-reconfigure keyboard-configurationEnable automatic time sync:
sudo timedatectl set-ntp trueVerify everything looks correct:
hostnamectl
timedatectl
locale
Reboot to apply all changes:
sudo rebootAfter reboot wait about 90 seconds, then SSH back in. Everything will be properly configured and SSH will come up automatically without any manual intervention.
Connect to WiFi and Fix the Broken NVIDIA Repo
Connect to WiFi:
sudo nmcli device wifi connect "YourWiFiName" password "YourWiFiPassword"Fix the broken NVIDIA apt repository. This affects every fresh JetPack 6.2 install. The repo URL contains the literal string <SOC> instead of the actual chip codename, which causes a 404 error on every apt update. Fix it with:
sudo sed -i 's|https://repo.download.nvidia.com/jetson/<SOC>|https://repo.download.nvidia.com/jetson/t234|g' \
  /etc/apt/sources.list.d/nvidia-l4t-apt-source.list
The Jetson Orin Nano uses the T234 SoC, so we replace <SOC> with t234.
Expand the SD card partition before running updates. The JetPack 6.2 image only creates a ~21GB root partition regardless of how large your SD card is. On a 128GB card, 107GB of space sits unused and apt upgrade will fail with a disk full error. Fix it before upgrading:
sudo apt install cloud-guest-utils -y --fix-missing
sudo growpart /dev/mmcblk0 1
sudo resize2fs /dev/mmcblk0p1
Verify the expansion worked:
df -hYou should now see the root partition /dev/mmcblk0p1 showing close to the full size of your SD card instead of 21GB.
Now run updates:
sudo apt update && sudo apt upgrade -yEnable MAXN SUPER Performance Mode (Optional)
JetPack 6.2 defaults to 25W mode. To unlock maximum performance:
sudo nvpmodel -m 0
sudo jetson_clocksInstall ROS 2 Humble
Ubuntu 22.04 (Jammy) is the exact OS that ROS 2 Humble targets on aarch64, so your Jetson is perfectly set up for it. Run all of these over SSH.
Set locale (required by ROS 2):
sudo apt install locales -y
sudo locale-gen en_US en_US.UTF-8
sudo update-locale LC_ALL=en_US.UTF-8 LANG=en_US.UTF-8
export LANG=en_US.UTF-8
Add the ROS 2 repository:
sudo apt install software-properties-common curl -y
sudo add-apt-repository universe
export ROS_APT_SOURCE_VERSION=$(curl -s https://api.github.com/repos/ros-infrastructure/ros-apt-source/releases/latest | grep -F "tag_name" | awk -F'"' '{print $4}')
curl -L -o /tmp/ros2-apt-source.deb "https://github.com/ros-infrastructure/ros-apt-source/releases/download/${ROS_APT_SOURCE_VERSION}/ros2-apt-source_${ROS_APT_SOURCE_VERSION}.$(. /etc/os-release && echo ${UBUNTU_CODENAME:-${VERSION_CODENAME}})_all.deb"
sudo dpkg -i /tmp/ros2-apt-source.deb
Install ROS 2 Humble desktop (includes RViz, demos, and all tools):
sudo apt update
sudo apt install ros-humble-desktop -y
This takes 10–15 minutes depending on your WiFi speed.
Install development tools:
sudo apt install ros-dev-tools -yAuto-source ROS 2 on every login:
echo "source /opt/ros/humble/setup.bash" >> ~/.bashrc
source ~/.bashrc
Verify the install works. In your current SSH session run:
ros2 run demo_nodes_cpp talkerOpen a second SSH session and run:
source /opt/ros/humble/setup.bash
ros2 run demo_nodes_py listener
You should see the talker publishing and the listener receiving messages. ROS 2 Humble is fully installed and working.
Troubleshooting
SD card not showing up in Etcher after a bad flash
diskutil list
diskutil eraseDisk FAT32 SDCARD /dev/diskN
SSH key mismatch error
ssh-keygen -R 192.168.55.1SSH connection refused but ping works
Connect via the serial console in Step 7. From there run:
ssh-keygen -A && systemctl start sshNo /dev/tty.usbmodem* device appearing
Make sure you are plugged into the correct USB-C port (next to the 40-pin header, not the power port). Wait 90 seconds after boot before checking.
Jetson not showing up at 192.168.55.1
Make sure you clicked Allow on the macOS network permission popup when you first plugged in the USB-C cable.
Black screen on first boot with JetPack 6.2
You skipped the firmware update. Go back and do Step 2 with the JetPack 5.1.3 image first.
apt update gives a 404 error about <SOC>
This is a known JetPack 6.2 bug affecting every fresh install. Run:
sudo sed -i 's|https://repo.download.nvidia.com/jetson/<SOC>|https://repo.download.nvidia.com/jetson/t234|g' \
  /etc/apt/sources.list.d/nvidia-l4t-apt-source.list
oem-config error message on serial console
This is fine. It drops you to a root shell. Just run adduser and proceed as described in Step 7.
apt upgrade fails with "not enough free space"
Run the partition expansion from Step 10 before upgrading:
sudo apt install cloud-guest-utils -y --fix-missing
sudo growpart /dev/mmcblk0 1
sudo resize2fs /dev/mmcblk0p1
resize2fs: Permission denied even as root
The filesystem has errors blocking the online resize. Fix it by running fsck from your Mac with the SD card removed from the Jetson:
sudo /opt/homebrew/opt/e2fsprogs/sbin/e2fsck -f /dev/disk6s1Answer yes to all prompts. Then put the SD card back in the Jetson, boot, and run resize2fs again.
SSH stops working after a reboot
SSH was started manually but not fully persisted. Connect via serial console and run:
systemctl enable ssh
systemctl start ssh
ros2 command not found after install
You need to source the ROS 2 setup file. Either run manually, or make sure the echo line was added to your ~/.bashrc and then open a new SSH session:
source /opt/ros/humble/setup.bashKey Takeaways
Most headless Jetson guides get stuck trying to make SSH work before the system is fully configured. The correct approach is to use the USB serial terminal first, which is always available regardless of SSH state, user accounts, or whether oem-config ran. Once you have a shell via serial, you configure SSH yourself in about 30 seconds and never need a monitor or keyboard again.
The three things the USB-C cable gives you simultaneously that almost nobody talks about:
- •Ethernet at 192.168.55.1 for SSH and file transfer once SSH is running
- •L4T-README mass storage containing official NVIDIA documentation about exactly how to connect
- •Serial terminal at /dev/tty.usbmodem* for unconditional shell access regardless of system state
The L4T-README volume that mounts on your Mac contains a file called README-usb-dev-mode.txt that documents all of this. Read it. It tells you everything. We learned this the hard way after hours of fighting SSH when the answer was sitting right there on a mounted drive the whole time.
Tested on NVIDIA Jetson Orin Nano Super Developer Kit with JetPack 6.2 and macOS Sequoia on MacBook Pro M2.
Want to know what went wrong before this guide existed?
This guide gives you the clean path. The companion document covers every mistake made during the real setup session that produced it — wrong JetPack version, corrupted filesystem, missing SSH host keys, and why the serial console was the answer all along.
Read: What Went WrongBuilding something with the Jetson Orin Nano? We're using it at Purpose Robotics as the brain of our autonomous retail fulfillment robots. If you're working on robotics or want to see what we're building, we'd love to hear from you.